
This wikiHow teaches you how to make a 3D model using 3D design software. Digital 3D modeling (often referred to as CGI for computer graphics illustration, or CAD for computer aided design) is used in art, film and animation, and video game design, as well as architecture, engineering, and product design. There are lots of programs and applications that can be used to create 3D models for different purposes. For this wikiHow, SketchUp will be used, because it is free and easy to learn.[1]
Part1
ADVERTISEMENT
Starting a New SketchUp File
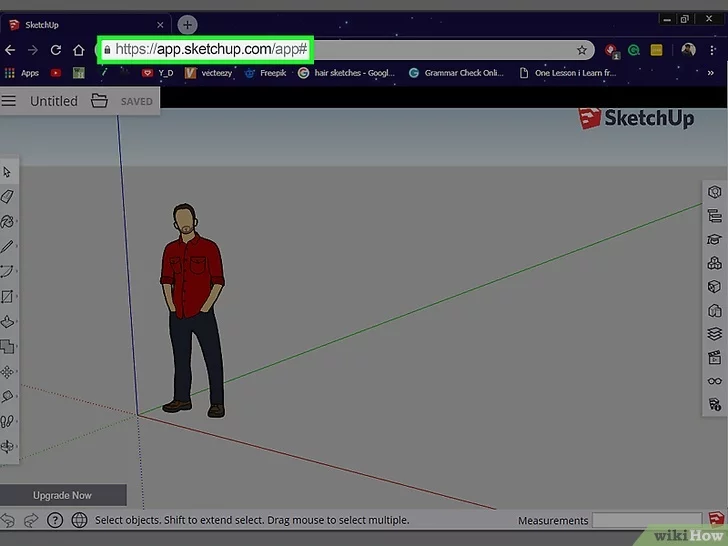
- 1Go to https://app.sketchup.com in a web browser. This is the website for the SketchUp web application. You can sign in to SketchUp with your Google account. After you sign in, it opens a new 3D model file. When you open a new file, it displays a drawing of a man with a red shirt.
- If you are not signed in to your Google account automatically, click an account you wish to sign in with and type the password to sign in to that account. If none of the accounts listed are an account you want to use, click Use another account and sign in with the email and password associated with that account. You can also create a new account by typing an email address in the email bar and clicking Next. Then follow the on-screen instructions. You’ll also need to agree to the terms of service and privacy policy.
- The first time you sign in to SketchUp, it gives you the option to view a tour. If you wish to take a tour, click Take Tour. The tour explains each of the buttons in the tool bars to the left, right, top and bottom of the screen. If you wish to skip it, click Start Modeling instead.
- Click here to try a free trial of SketchUp Pro, which allows access to the desktop version of SketchUp.
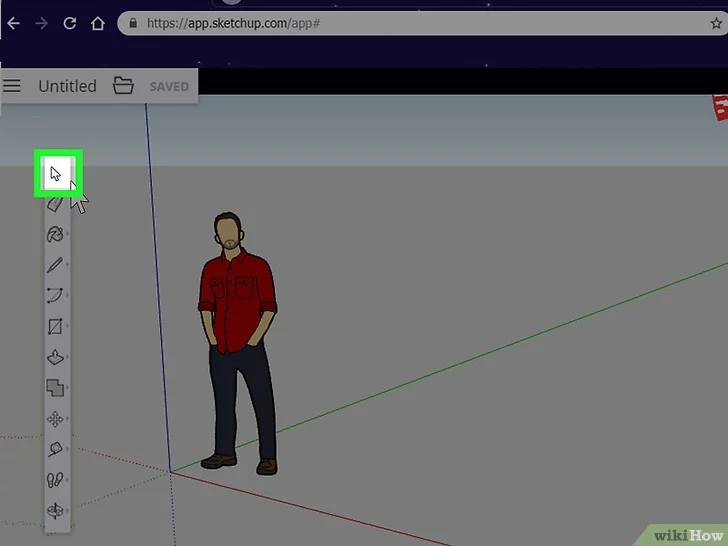
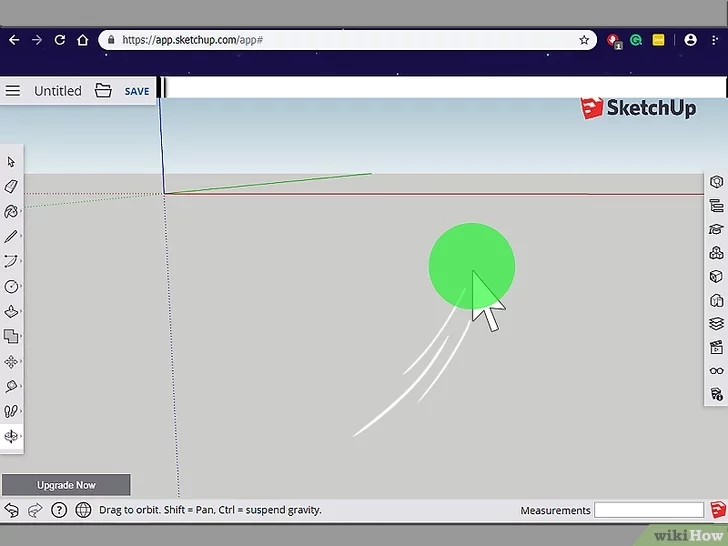
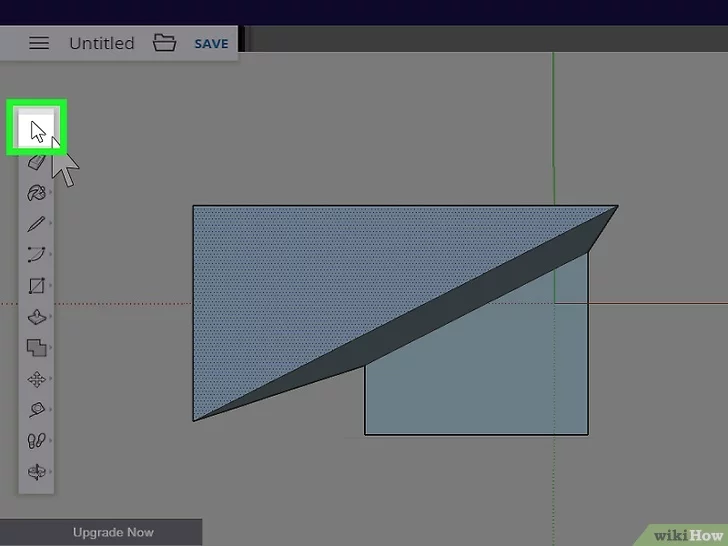
- 2Click the white arrow icon. It’s at the tool bar at the top-left. This is the Select tool. Use this tool to select objects in the 3D work space.
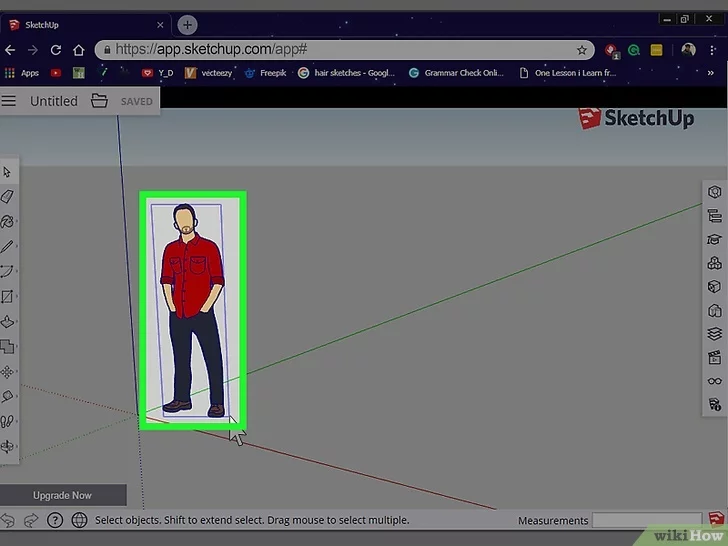
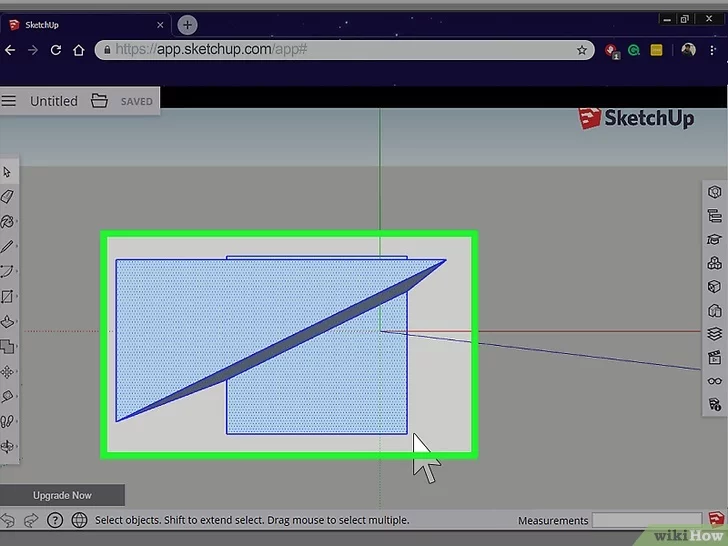
- 3Click and drag a square over the drawing of a man. When an object is selected, a blue square appears around the object and all the lines in the object turn blue.

- 4Press Delete. This erases the man from the screen and leaves you with a blank 3D canvas.
- You can also click the eraser icon in the tool bar to the left and drag it over the man.
Part 2
Navigating the 3D Work Space
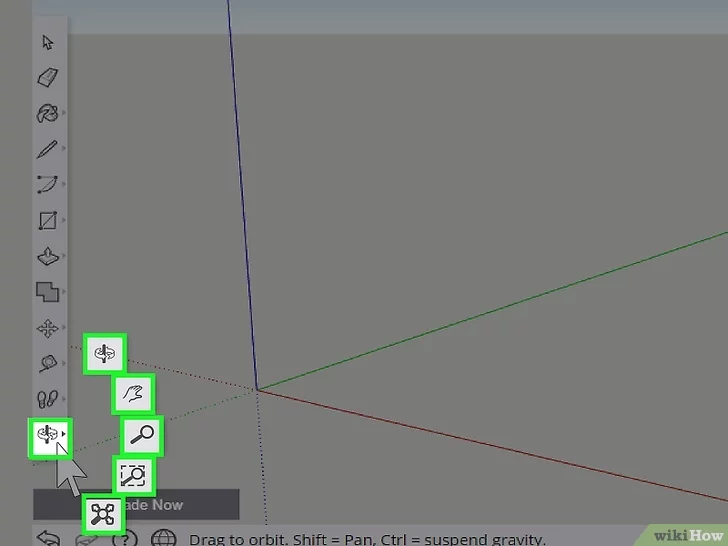
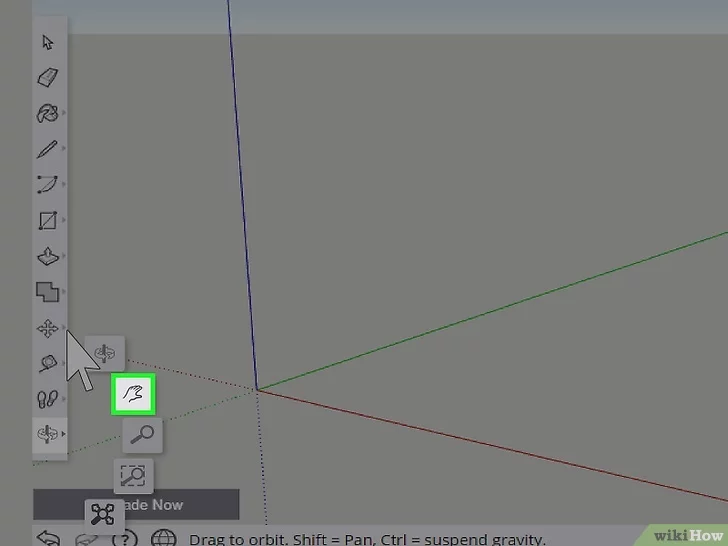
- 1Click the two arrows around a pole. It’s at the bottom of the tool bar on the left side of the SketchUp app. When you click this icon, 5 new icons pop out. These are the navigation tools you use to change your view in the 3D work space.
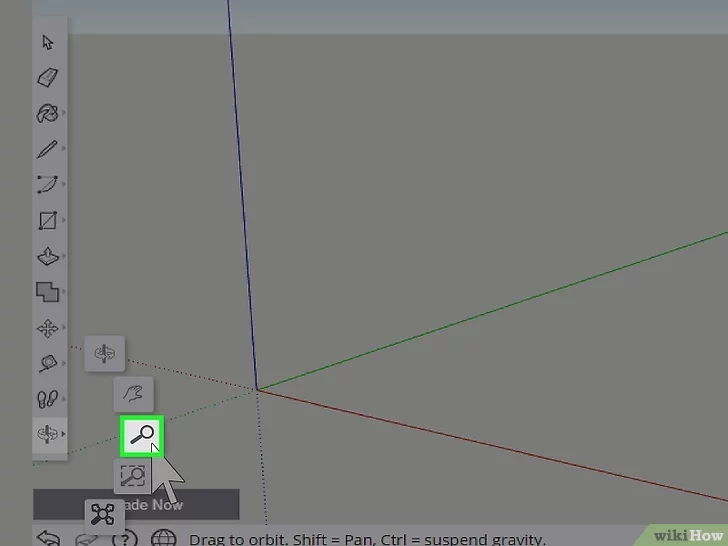
- 2Click the magnifying glass icon. It’s the third option when you click the navigation icon in the tool bar to the left. This is the zoom tool. Use this tool to zoom in and out of the work space.
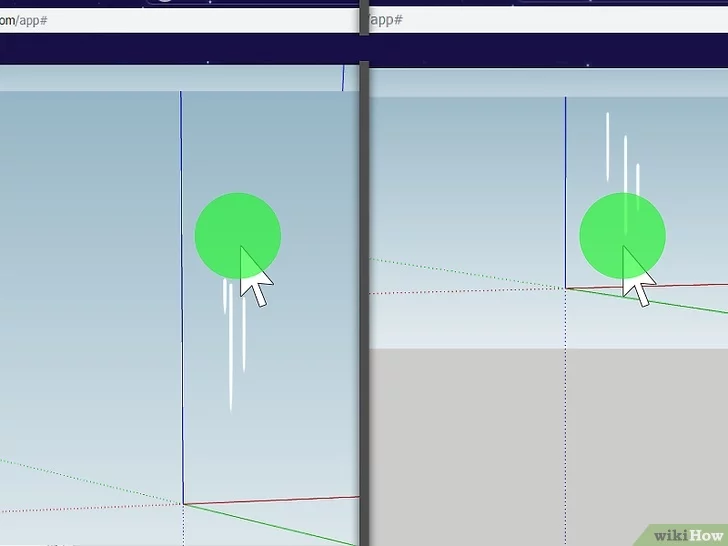
- 3Click and drag up or down in the 3D work space. With the zoom tool select, click the 3D work space and drag up to zoom in. Click and drag down to zoom out.
- You can also zoom in and out by rolling your mouse wheel up and down.
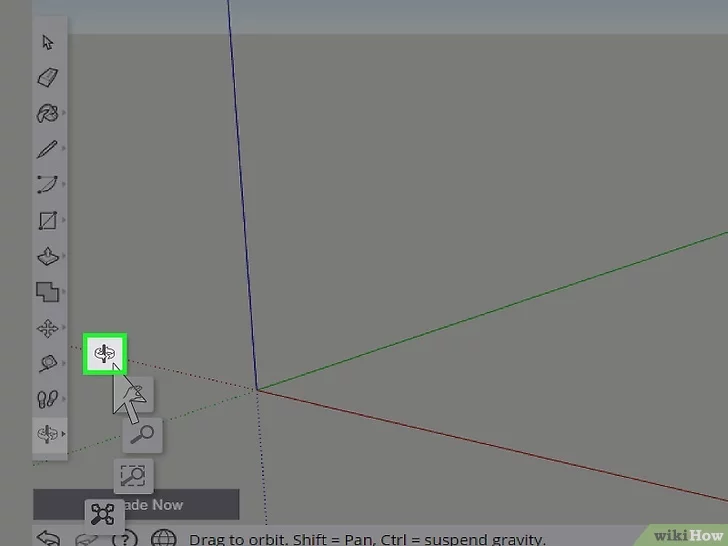
- 4Click the icon with two arrows around a vertical line. It’s the first tool that pops up in the navigation tools in the tool bar to the left. This is the rotation tool. Use this tool to rotate in the 3D work space.
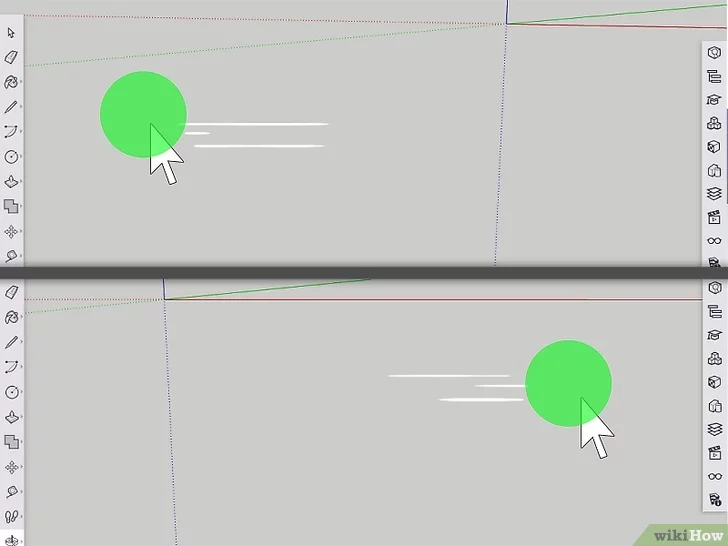
- 5Click and drag left or right. With the rotation tool selected, click and drag left or right to rotate your view in the 3D space.
- You can also rotate by pressing the mouse wheel down and dragging left and right.
- 6Click the icon with a hand. It’s the second tool that appears in the navigation tools when you click the icon at the bottom of the tool bar to the left. This is the pan tool.
- 7Click and drag in the direction you want to pan. With the pan tool selected, click the 3D space and drag in the direction you want to pan to shift your view left, right, up, or down.
- You can also pan by pressing the mouse wheel and Shift key at the same time and dragging in the direction you want to pan.
Part 3
Creating 2D Shapes

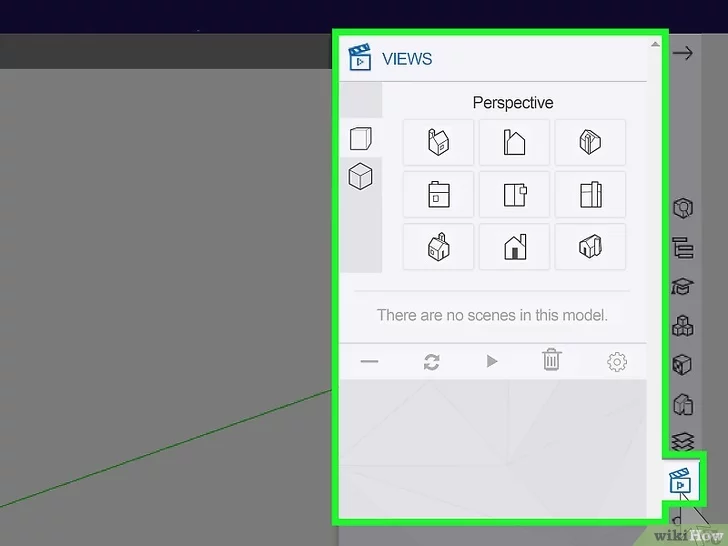
- 1Click the icon that resembles a director’s clapboard. This is the “Views” button. It’s in the tool bar on the right side. This displays a sidebar menu to the right.
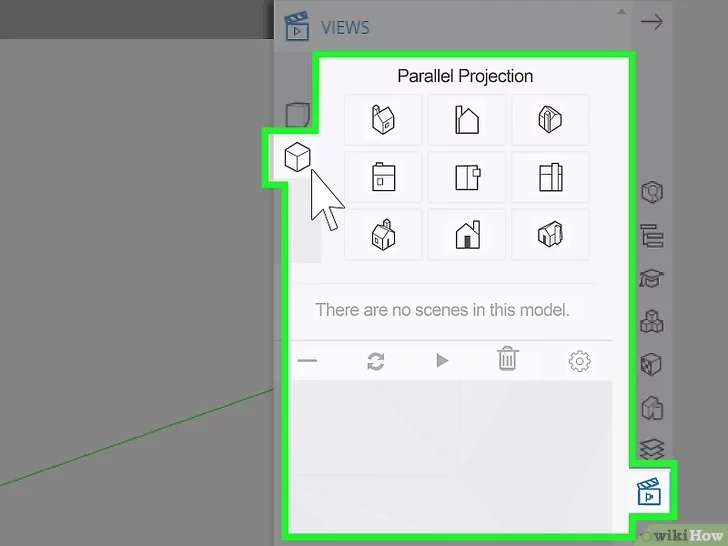
- 2Click the “Parallel Projection” cube. It’s the second cube on the left side of the sidebar to the right. This displays view options using a parallel projection (Orthographic view). The first cube displays view options from a perspective view.
- Perspective View: Perspective view displays 3D objects the way you would see them in real life. Objects appear smaller at a distance, and parallel lines converge at a point in the distance. Use this view when creating 3D objects.
- Parallel Projection/Orthographic View: This view displays objects with no perspective. Objects appear flat. They also appear the same size regardless of distance. Use this view when creating 2D objects or a particular side of a 3D object.
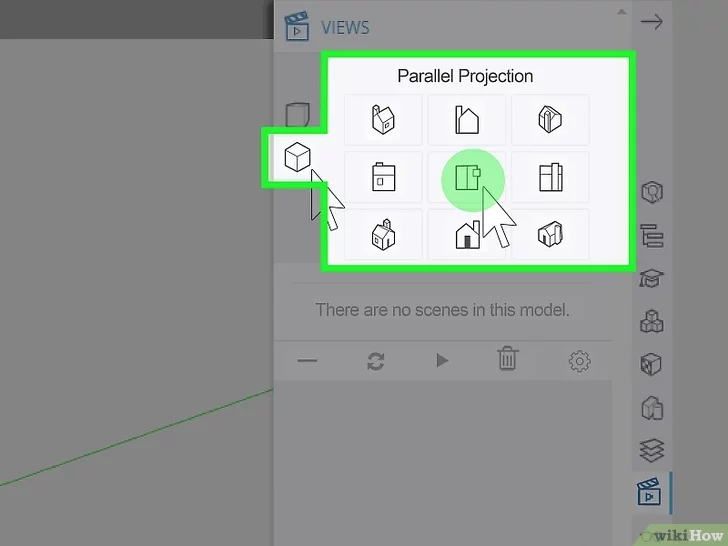
- 3Click the appropriate view. There are 9 view options under “parallel projection” in the Views menu. Select the view that you want the object you are creating to face. If you are creating a house or building. Select “Top View” to draw the foundation of the building. If you are creating a door or window, select the side the door or window is facing.
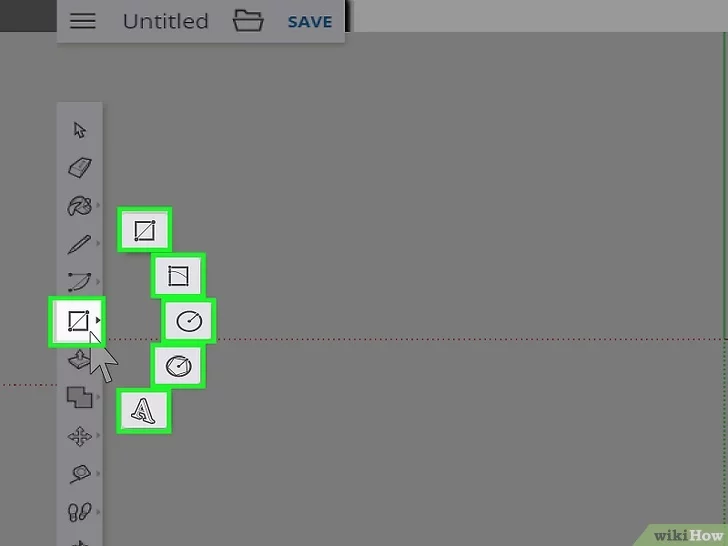
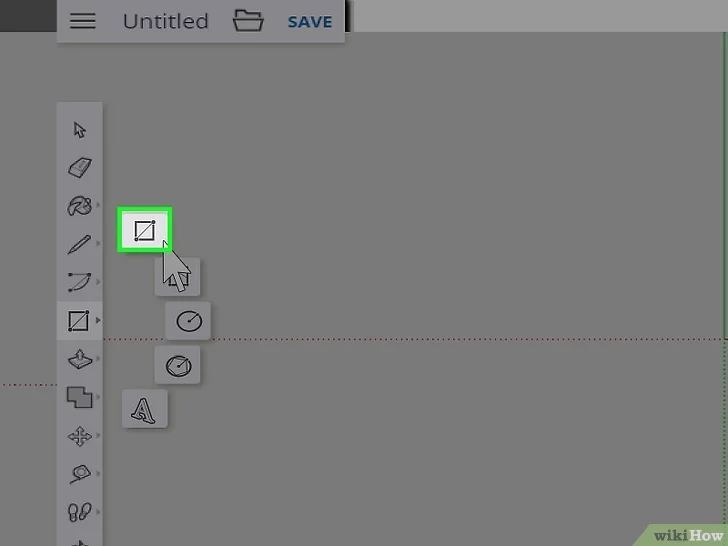
- 4Click the shape tool. The shape tool resembles a rectangle, circle, or polygon. It’s the sixth option in the tool bar to the left. When you click the Shapes button, a variety of shapes pop-up around the icon.
- 5Click a shape. There are five shapes you can choose from. These are a rectangle, rotated rectangle, circle, polygon, or 3D text.
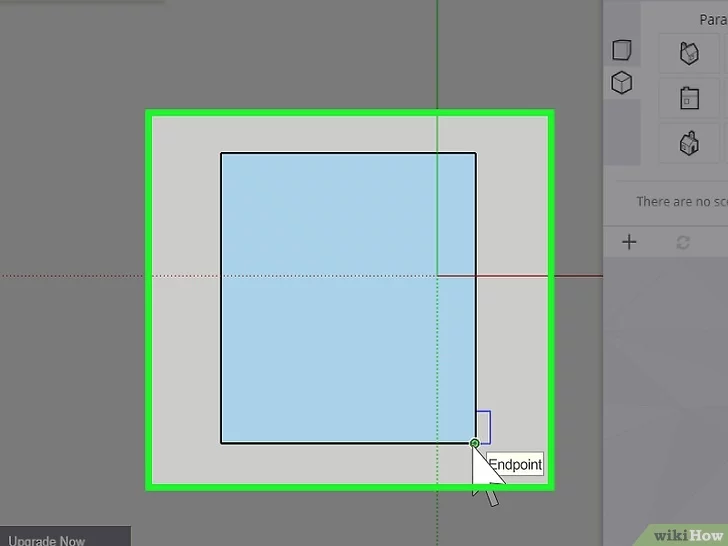
- 6Click and drag in the 3D work space. This creates a flat, 2D shape in the work space. Rectangles can be any size you want. Circles and polygons are always create a perfectly proportional shape.
- If you want to create 3D text, click the 3D text icon, type a message and click OK. Then click where you want to the 3D text to go in the work space.
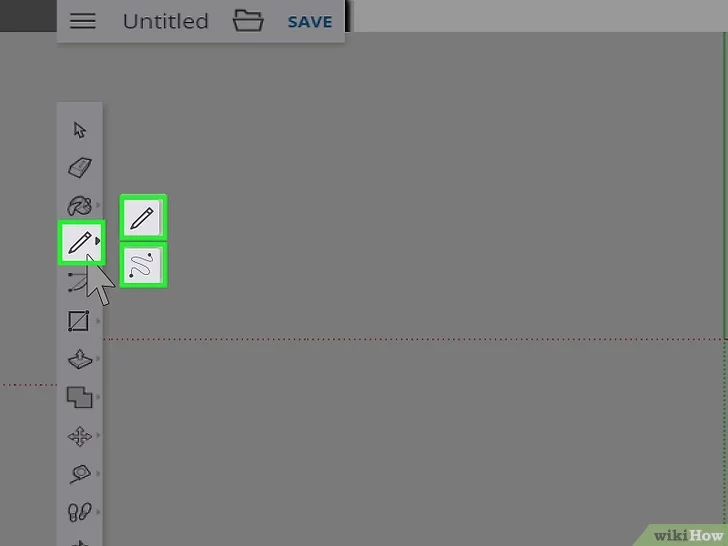
- 7Click the line tool. It’s the fourth option in the sidebar to the left. The line tool is the icon that resembles a pencil, or squiggly line. This tool allows you to create your own 2D shapes. Clicking the line tool displays two options.
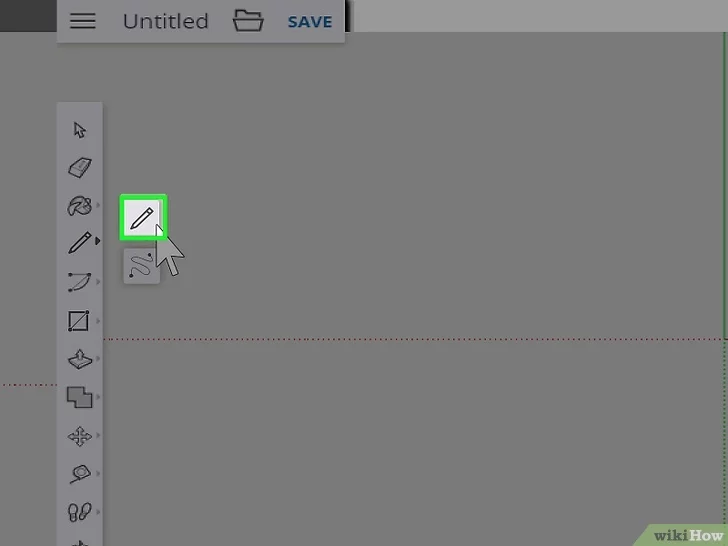
- 8Click the Pencil or squiggly line icon. The pencil is the line tool. It allows you to draw straight line segments. The squiggly line tools is the freehand tool. This allows you to draw free hand.
- 9Click and drag to draw a line. The line tool draws straight lines. The freehand tool draws lines in the shape of your hand movements.
- You can also use the line tool to divide shapes. For example, drawing a line down the center of a rectangle divides the rectangle into two smaller rectangles. This allows you to add details to shapes.
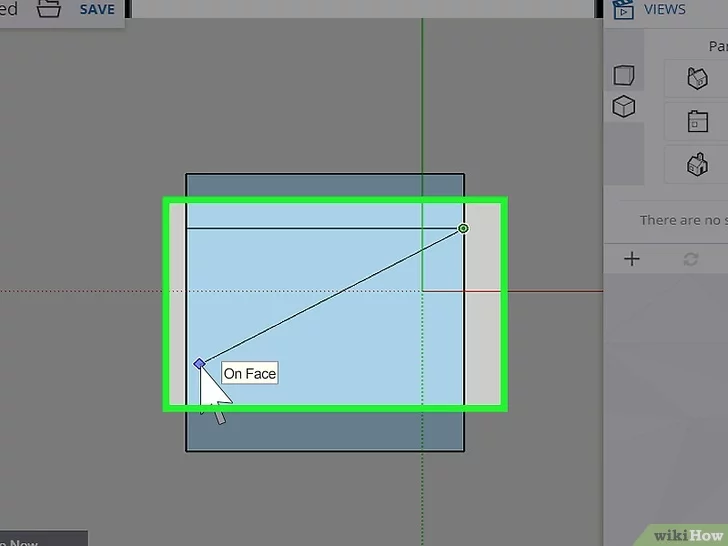
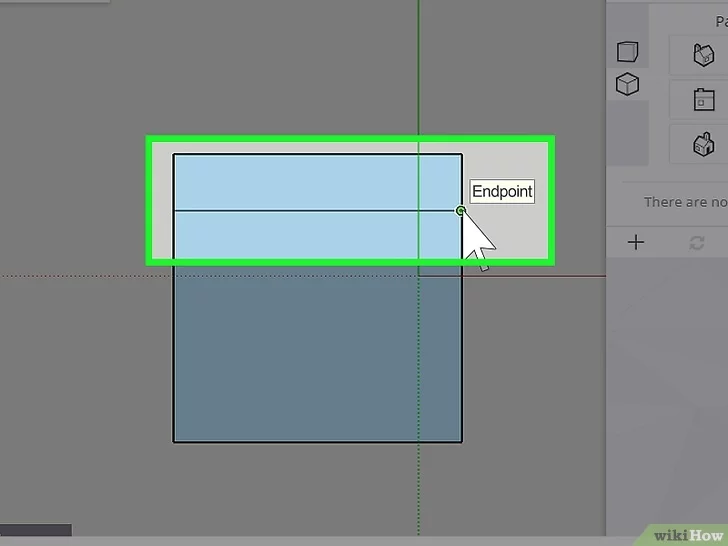
- 10Add another line to your shape. To add another line to your shape, click one of the ends of the line you just drew, and drag the mouse to add another line segment. You can do this with the line tool or the freehand tool. Do this for as many line segments as you want to add to your shape.
- 11Draw a line to the starting point of your shape. To complete your shape, draw a line from one line segment to the starting point of your shape. When the shape is completely enclosed (no gaps in the line segments), the inside of the shape turns blue. This indicates that you have just drawn a 2D shape.
- You can add details to shapes by drawing smaller shapes on them.
- To cut out the inside of a shape, simply draw a shape and then draw another shape inside the shape. Use the select tool to select the inner shape, and then press the “Delete” key to remove the inside shape.[2]
Part 4
Turning 2D Shapes into 3D Objects
- 1Click the icon that resembles a director’s clapboard. This is the “Views” button. It’s in the tool bar on the right side. This displays a sidebar menu to the right.
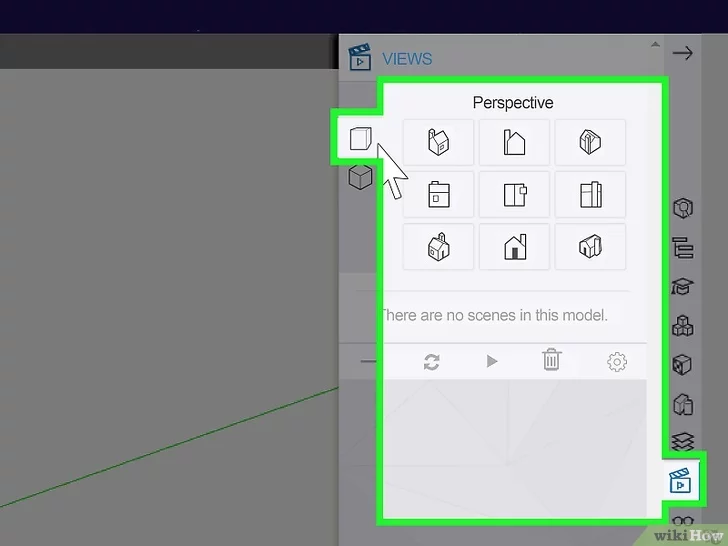
- 2Click the “Perspective” cube. It’s the first cube on the top. This displays view options that use a perspective view.
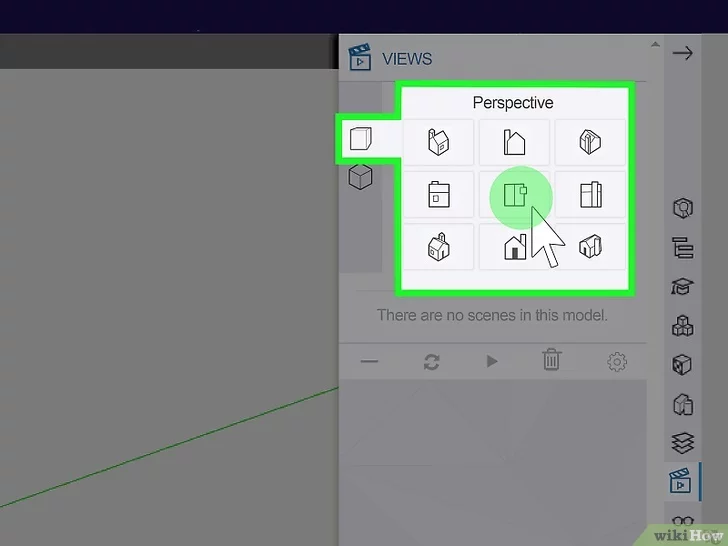
- 3Select an appropriate view. You should be able to see your 2D object in 3 dimensions. The red, green, and blue axis lines should be visible.
- If you need to adjust your view further, press the mouse wheel down and drag to adjust your view.
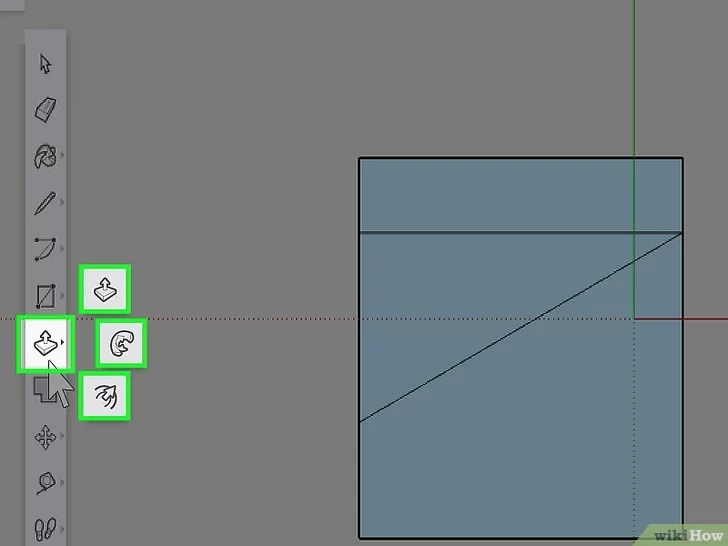
- 4Click the icon that resembles a square with an arrow pointing up. It’s the seventh icon down in the tool bar to the left. This displays three icons that can be used to manipulate objects.\
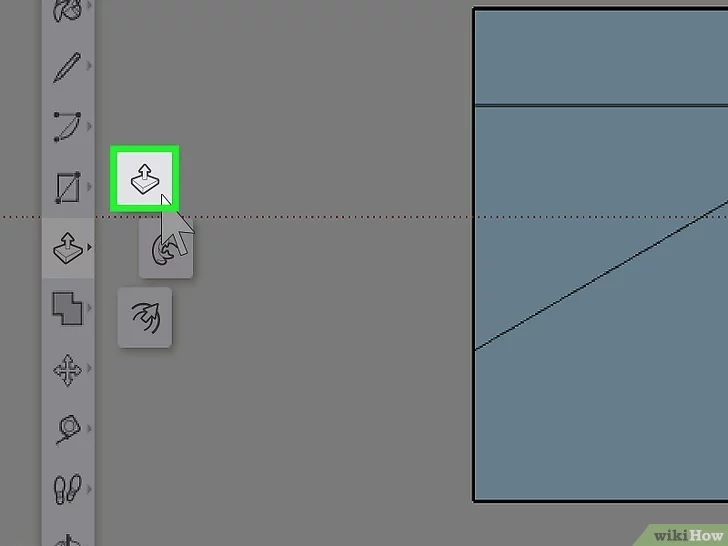
- 5Click the icon that resembles a square with an arrow pointing up. This is the “Push/Pull” tool. It’s the first option under the icon that allows you to manipulate objects.
- 6Click your 2D object and drag up. This extrudes the flat face of your 2D object. This turns it into a 3D object. You can use this technique to create basic 3D shapes. For example, you can create a poll by drawing a circle and then using the Push/Pull tool to extrude the face of the circle upwards.
- You can also apply Push/Pull to any side of a 3D object. Click the side of an object, and use the Push/Pull tool to extrude the surface out, or push it in. This allows you to turn simple 3D shapes into complex 3D shapes.
Part 5
Moving, Rotating, and Scaling Objects
- 1Click the icon that resembles a white arrow. This is the select tool. It’s the first tool in the tool bar to the left.
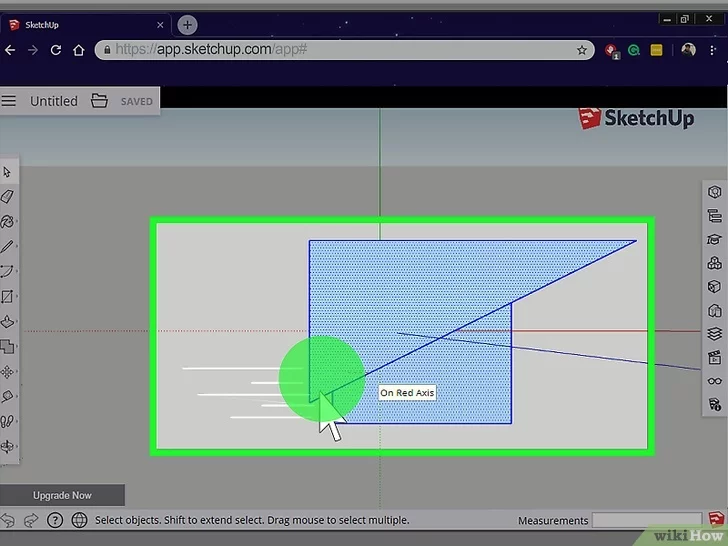
- 2Drag a box around the object you want to move or scale. Selected objects have a blue dot pattern on their face with the lines highlighted in blue.
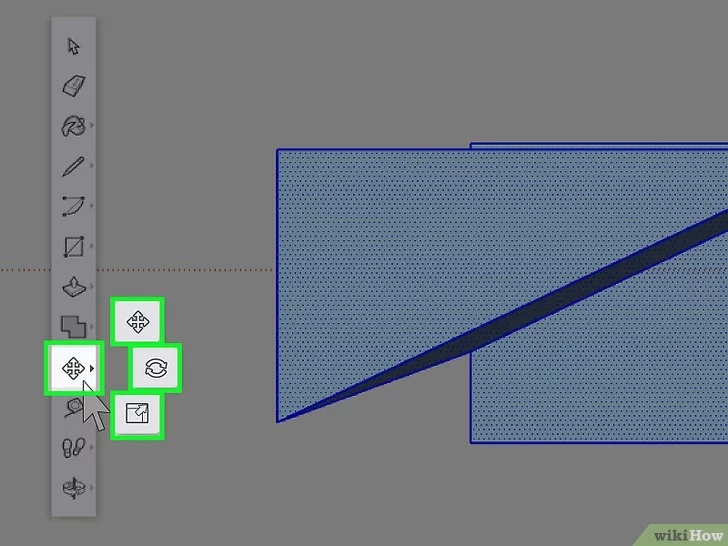
- 3Click the icon that has 4 arrows in a cross shape. It’s the ninth option in the tool bar to the left. This displays three Move options.
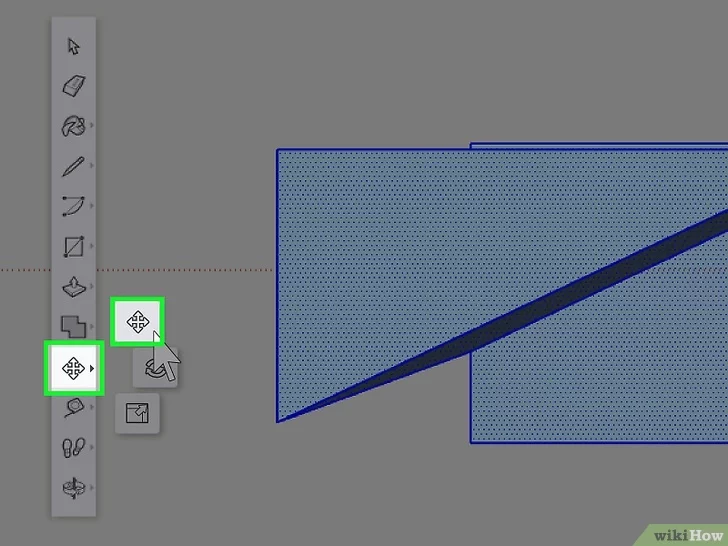
- 4Click the icon that has 4 arrows in a cross shape. It’s the first option that appears when you click the move icon. This is the Move tool. This allows you to change the position of an object.
- 5Click the object and drag it. To change the position of an object in the 3D work space, click and drag objects with the move tool.
- You can also manipulate an object’s shape by moving individual faces or lines of a 3D object.

- 6Click the icon with two circular arrows. It’s the second option under the Move options in the tool bar to the left. This is the rotate tool.
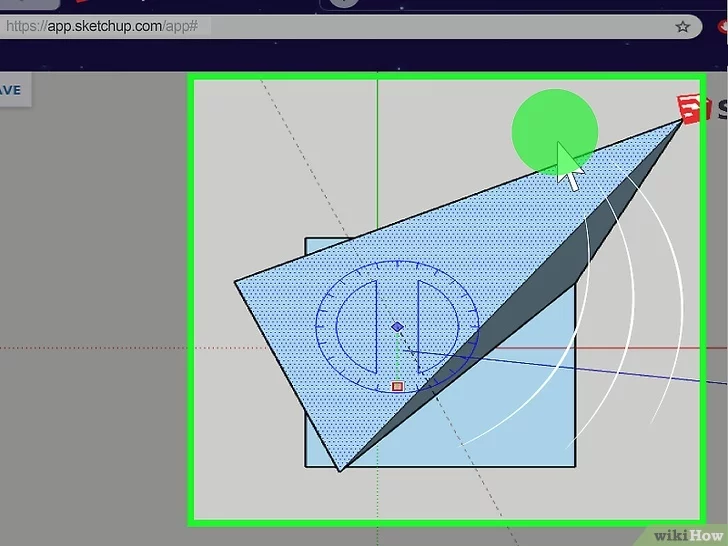
- 7Click and drag an object. This rotates an object in the 3D work space.
- You can also manipulate object’s shape by selecting an individual face of a 3D object and rotating that face.
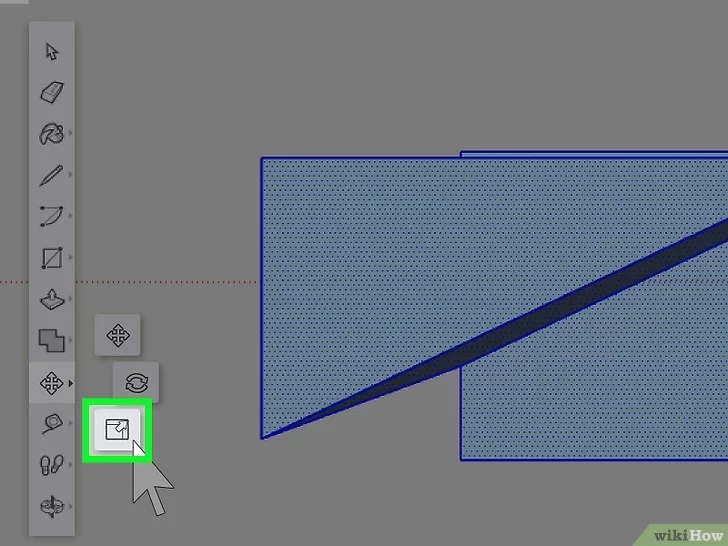
- 8Click the icon that resembles a rectangle inside another rectangle with an arrow. It’s the third option in the Move tools in the tool bar to the left. This is the scale tool. Use this tool to make objects bigger or smaller.
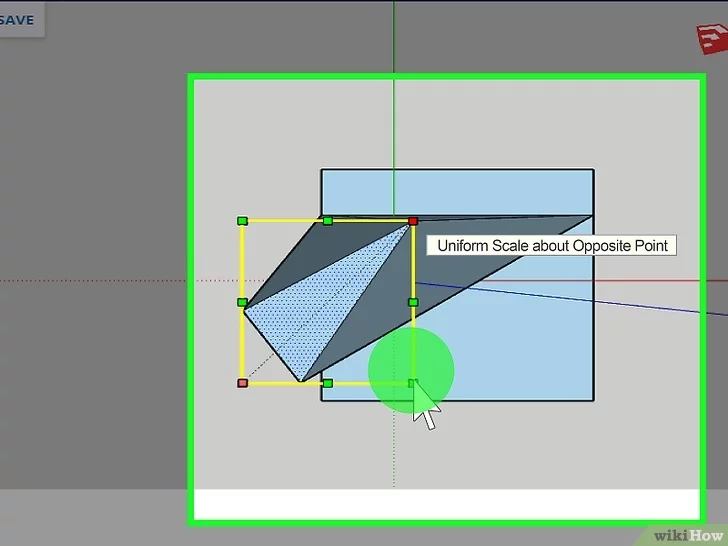
- 9Click and drag an object. With the scale tool select, click and drag an object to make the object bigger or smaller. Drag away from the object to make it bigger. Drag towards the object to make the object smaller.
- You can also manipulate object’s shape by scaling an individual face of an object. For example, you can make a cup or bucket by making a small cylinder. Click the top face and scale it so it is slightly larger than the base. Then press the delete button to delete the top face.
Part 6
Applying Textures and Colors to an Object

- 1Click the icon that resembles a cube with a square pattern on one side. It’s in the tool bar to the right. This is Materials tab. Clicking this icon displays a sidebar menu to the right for applying textures and colors to objects.

- 2Click the tab with a magnifying glass. It’s the second tab in the sidebar menu to the right. This is the material browser.
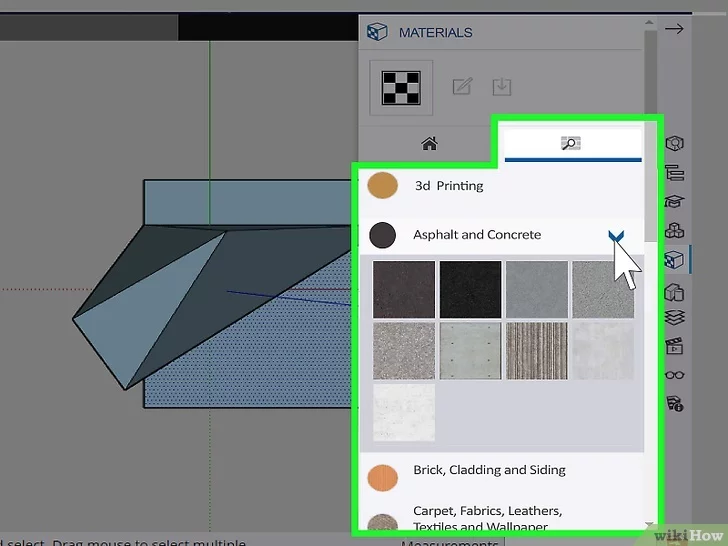
- 3Click a material category. There are a variety of material categories. These categories include colors, patterns, brick and siding, concrete and asphalt, metal, glass and mirror, landscape, tile, stone, wood, and more.
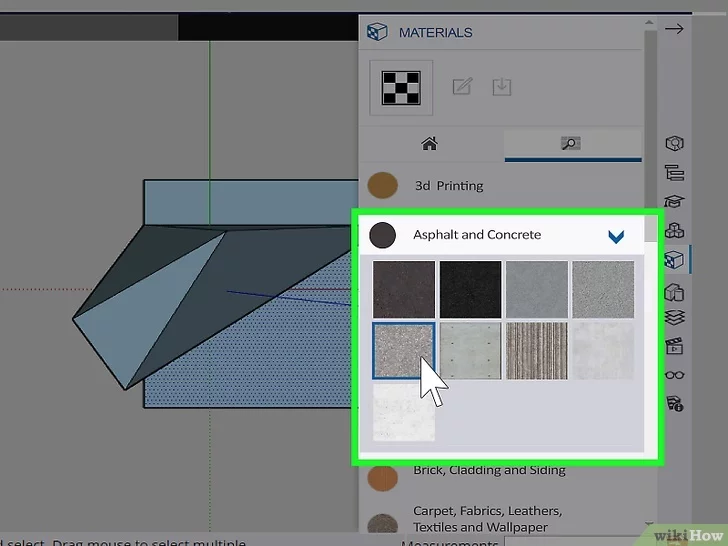
- 4Click a material. Materials are listed with tiny thumbnail images in the side bar panel to the right. Click the thumbnail image of the material you want to apply.
- The free version of SketchUp has a limited number of materials. The paid version has more materials you can use.
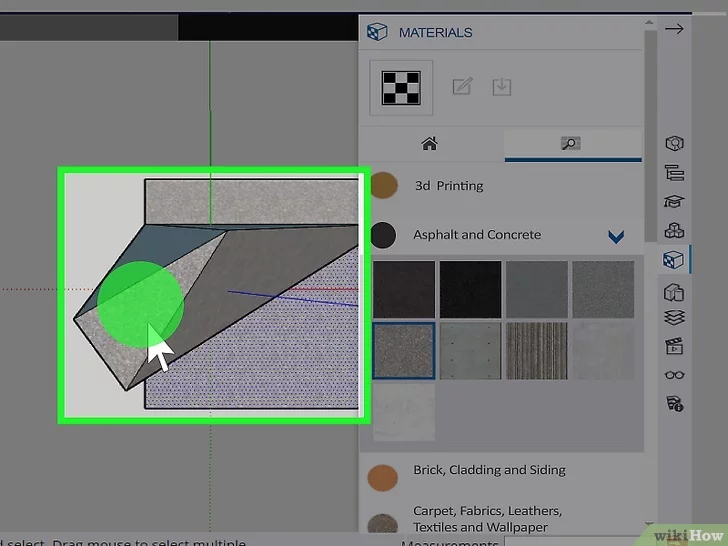
- 5Click the faces you want to apply the textures to. This applies the texture to the individual face. You can apply different textures to different sides of a 3D object, or you can use the select tool to select the entire object and apply a material to the entire object.
Part7
Saving a Model
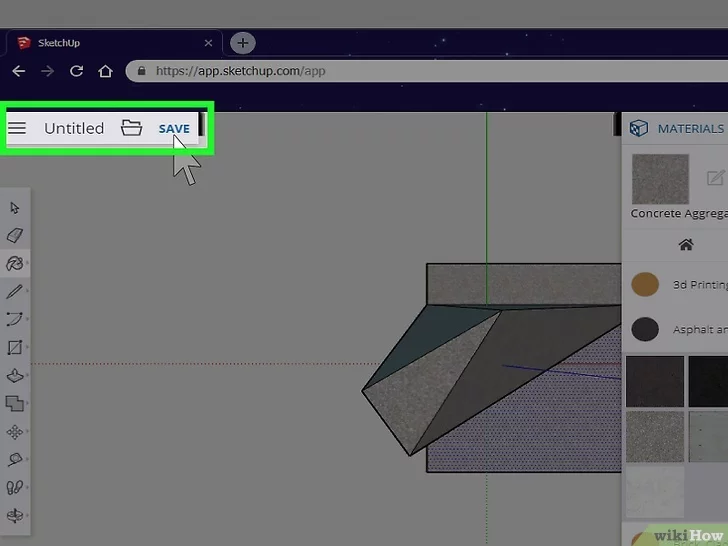
- 1Click Save. It’s in the upper-left corner of the screen. The first time you save your file, a pop-up appears to the left that allows you to name your file and save it.
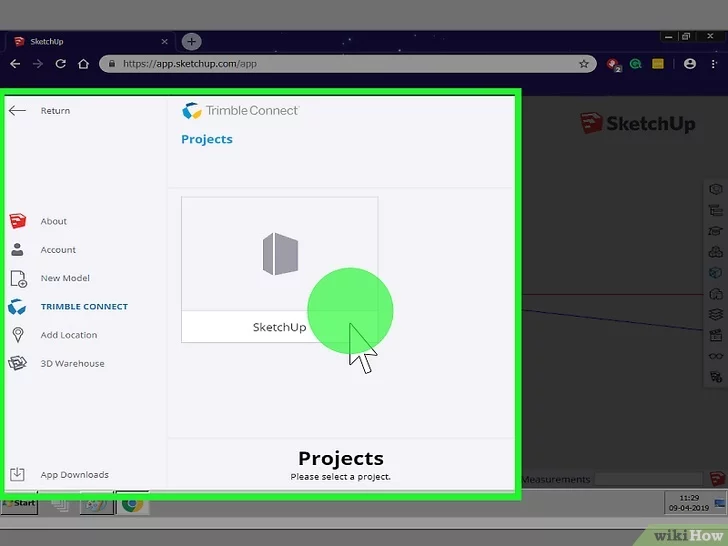
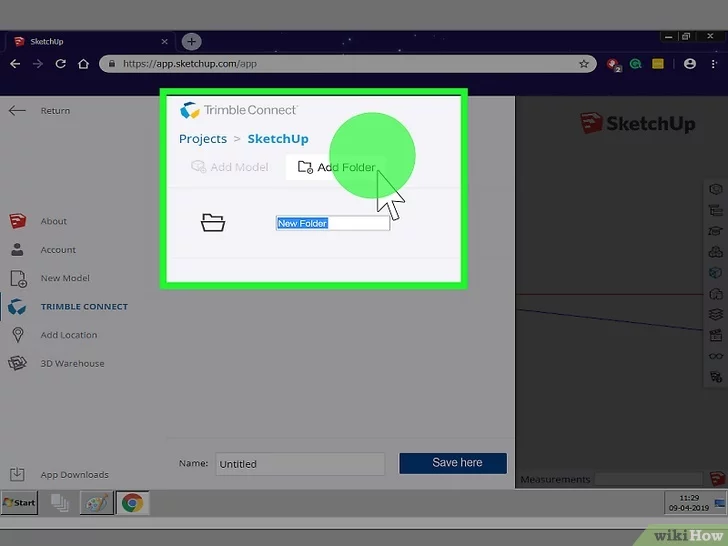
- 3Click Add Folder (optional). If you want, you can create different folders to save your files in. If you want to create a new folder, click New Folder at the top of the pop-up. This displays a new folder in the list of files.
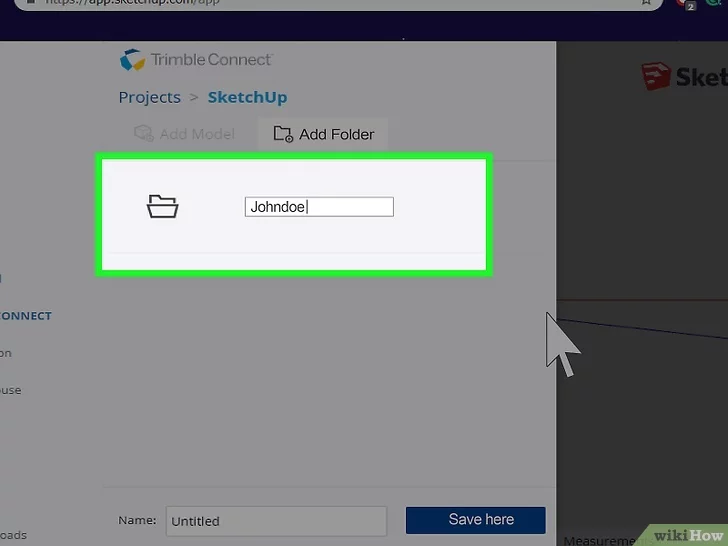
- 4Type a name for your folder. If you are creating a new folder, type a name for the folder next to the folder in the list of files.
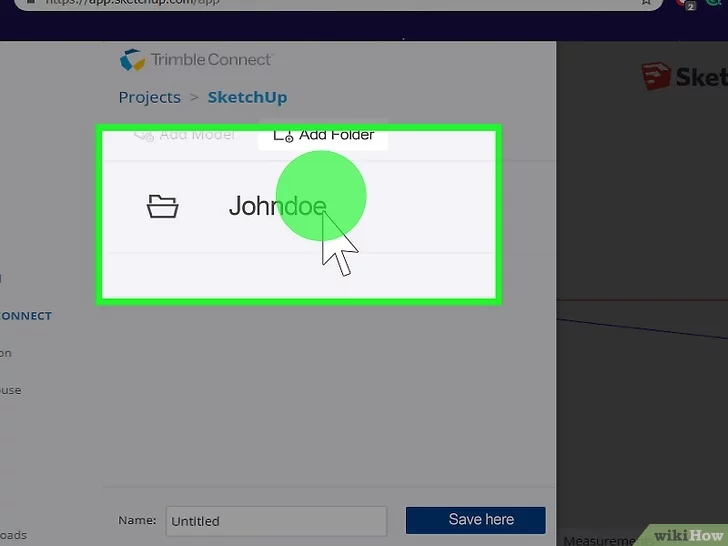
- 5Click the folder you want to save the file to. If you have more than one folder in your list of files, click the folder you want to save the file to.
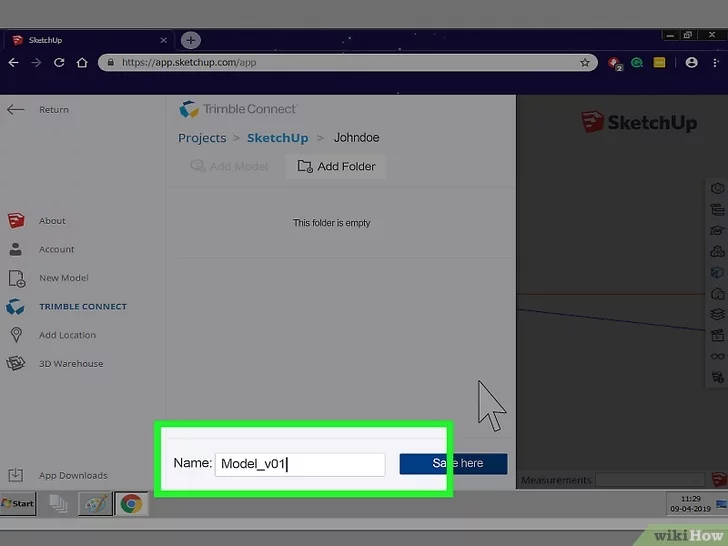
- 6Type a name for your model. Type a name for your model in the space labeled “Name” at the bottom of the screen.
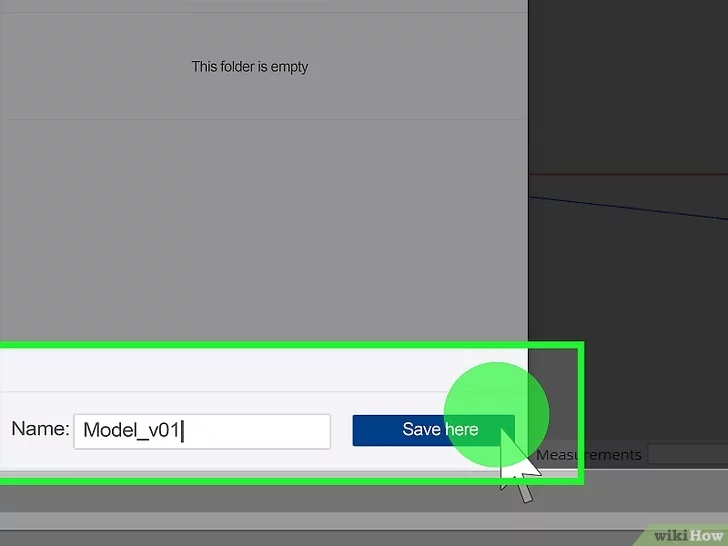
- 7Click Save Here. This saves the file to the folder you selected. It may take a minute or two for the file to save.
Tips
- Before building a 3D model on your computer, it helps to draw it on paper first. Use graph paper and draw your object from the front and side (and possibly top and back, if necessary). Make sure you draw all features in the same location in all versions of a model. For example, if you are designing a character, don’t draw the nose lower in side drawing than the front model.
- Try using other 3D modeling software. SketchUp is great software for beginners, but it is by no means the only one. Other free 3D modeling programs include TinkerCAD, Blender3D, FreeCAD, and OpenSCAD. Paid professional programs include, 3DS Max, Maya, AutoCAD, Cinema4D, SolidWorks, and Rhinoceros 3D.
References
- ↑https://maker.pro/3dr/tutorial/how-to-make-3d-models-for-beginners
- ↑https://i.materialise.com/blog/en/first-3d-model-in-sketchup-tutorial/
ADVERTISEMENT