
Starting with Adobe Photoshop can feel overwhelming, but it’s like any new skill: start simple. You’ll learn the basics, from the interface to key features like layers, selection tools, and image adjustments.
By the end, you’ll know how to enhance and transform your images confidently. Dive in, experiment, and watch your digital artistry grow.
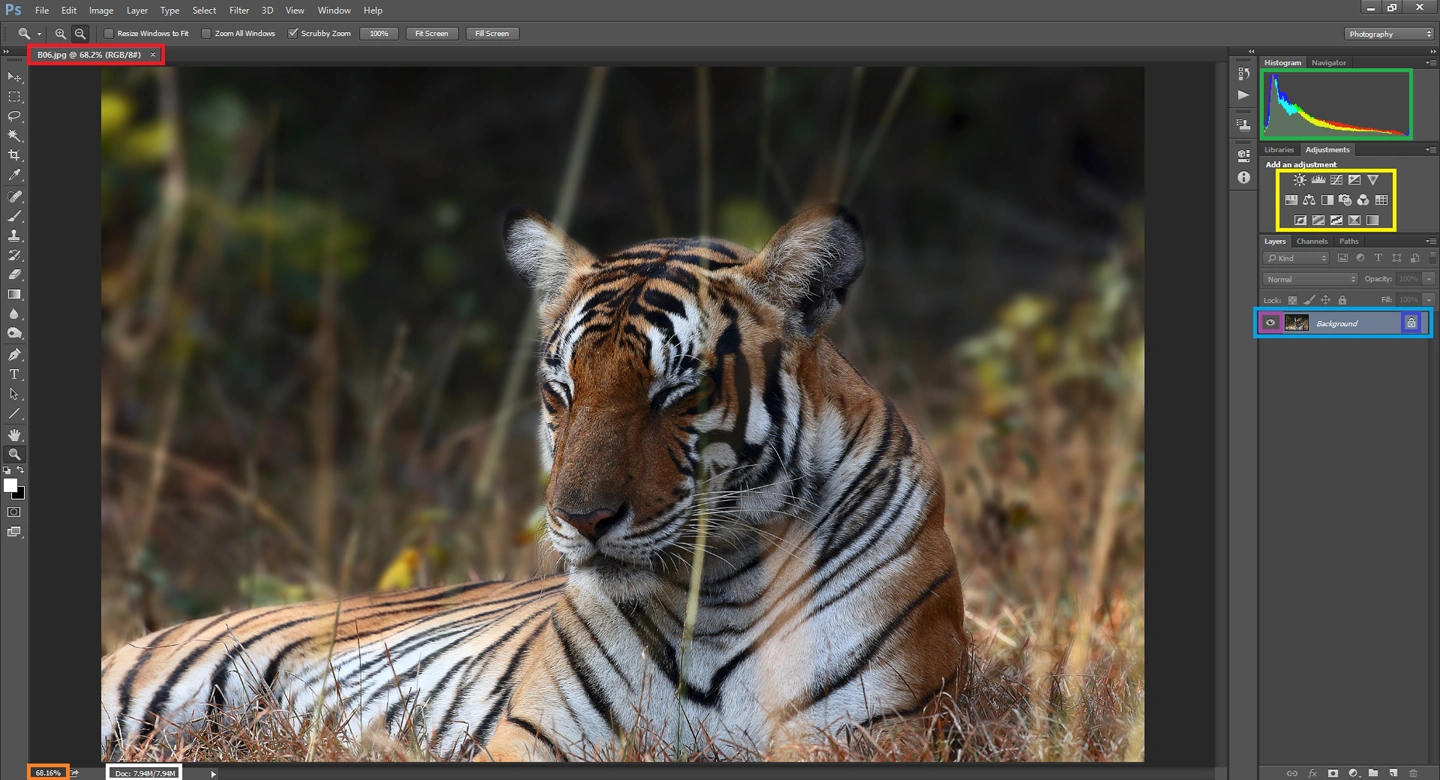
Understanding the Workspace: Navigating the Toolbar and Panels
The Adobe Photoshop CC workspace consists of several key areas. The Menu Bar at the top provides access to an extensive list of commands and settings.
You can rearrange and customize the workspace to suit your workflow. The Toolbar, typically on the left, contains tools for editing images, such as selection tools, paintbrush, and clone stamp.
You can adjust the behavior of these tools using the Options Bar at the top, which changes depending on the selected tool.
On the right side are the Panels like Layers, Adjustments, and History, which are Photoshop essentials for non-destructive editing and managing various aspects of your project.
How to perform the basic features in Adobe Photoshop?
To perform basic tasks in photo editing in Photoshop, follow these steps:
- Open an Image: Go to ‘File’ > ‘Open’ and choose your image.
- Zoom: Use the magnifying glass tool or press ‘Ctrl’ (or ‘Cmd’ on Mac) plus ‘+’ or ‘-‘ to zoom in or out.
- Layers: Click the ‘New Layer’ button in the Layers Panel to create a new one. Drag layers to reorder them.
- Selection Tools: Use the Marquee or Lasso tools to select parts of your image. Click and drag to define the area.
- Crop: Select the Crop tool, drag the edges of the crop box, and press ‘Enter’ to crop.
- Brush: Choose the Brush tool, pick a color and size, and paint on your image.
- Text: Click the ‘T’ icon, click on your image, and start typing.
- Eraser: Select the Eraser tool to remove parts of your image.
- Adjustments: Add adjustment layers for non-destructive edits to brightness, contrast, saturation, etc.
- Save: Go to ‘File’ > ‘Save As’ and choose your desired format.
You can make this in any version, like Photoshop CS6 o the basic Photoshop CS3.
Layers 101: Building Images in Non-Destructive Ways
The use of Photoshop to build images non-destructively with layers implies this:
- Use Adjustment Layers: Instead of applying changes directly, use adjustment layers from the Layers Panel for edits like brightness, contrast, and color. This keeps your original image untouched.
- Layer Masks: Add a mask to hide or reveal parts of a layer. Paint black on the mask to hide and white to reveal. Masks are reversible.
- Smart Objects: Convert layers to Smart Objects before resizing or applying filters. This preserves the original data, so you can adjust edits anytime.
- Blending Modes: Find these in the Layers Panel. They let layers interact without permanently changing the underlying layer.
- Group Layers: Organize related layers into groups. This keeps your workspace tidy and lets you apply masks and adjustments to the group.
- Opacity and Fill: Change a layer’s opacity to make it more transparent, or adjust fill to affect only the content without influencing layer effects.
By using these techniques, you can tweak your image without permanently altering the original pixels either in Photoshop Portable or Photoshop Web.
Image Adjustments: Color Correction and Exposure
For color correction and exposure adjustments in Adobe Photoshop, do this:
- Levels: Hit ‘Ctrl/Cmd + L’ to open Levels. Adjust the sliders for shadows, midtones, and highlights to fix the overall tonality.
- Curves: Press ‘Ctrl/Cmd + M’ for Curves. Create points and adjust the line to control lightness and contrast.
- Hue/Saturation: Use ‘Ctrl/Cmd + U’. Move the sliders to change colors, saturation, and lightness.
- Color Balance: ‘Ctrl/Cmd + B’ gets you to Color Balance. Adjust tones in shadows, midtones, highlights without affecting others.
- Photo Filter: Add a filter for color casts. Choose a standard filter or custom color overlay.
- Exposure Adjustment Layer: Go to the Layers Panel, click ‘New Adjustment Layer’, and choose ‘Exposure’. Tweak exposure, offset, and gamma correction.
- Vibrance: Add a Vibrance adjustment layer to enhance colors without oversaturating skin tones.
- Camera Raw Filter: For comprehensive correction, use ‘Filter’ > ‘Camera Raw Filter’ for more advanced controls over exposure and color.
Regularly compare your original and edited images by toggling the layer visibility to ensure natural results.
Basic Retouching: Removing Blemishes and Unwanted Objects
To do basic retouching in Adobe Photoshop, use these steps:
- Healing Brush Tool: Select it from the Toolbar. Alt-click (Option-click on Photoshop for Mac) to sample a clean area of skin. Then click and paint over blemishes to blend them in.
- Spot Healing Brush: Click on minor blemishes with this tool set to ‘Content-Aware’ to remove them instantly. Photoshop will auto-select the sample area.
- Patch Tool: Draw around an object you want to remove, then drag it to a clean area to replace it.
- Clone Stamp Tool: Hold Alt (Option on Mac) and click to sample a good area. Then, paint over the unwanted object. This is best for detailed work.
- Content-Aware Fill: Select the unwanted object, then go to ‘Edit’ > ‘Fill’ and choose ‘Content-Aware’. Hit OK to let Photoshop fill in the selected area.
- Dust & Scratches Filter: Use this for small marks. Go to ‘Filter’ > ‘Noise’ > ‘Dust & Scratches’ and adjust the radius until the marks disappear.
Remember to frequently use ‘Ctrl/Cmd + Z’ to undo any mistakes.
Saving Files: Formats and Best Practices
The best formats to save files in Adobe Photoshop, depending on your needs, are:
- PSD: Photoshop’s native format. Saves all data like layers, masks, and adjustments. Best for ongoing work.
- JPEG: Good for final images intended for the web or email. Small file size but lossy compression.
- PNG: Great for web use, especially if you need transparency. Lossless compression.
- TIFF: Best for high-quality prints. Supports layers and lossless compression.
- PDF: Useful for sharing proofs or printable documents. Preserves vector graphics and fonts.
- GIF: For simple animations and images with limited colors.
Choose based on whether you need quality, small size, or editability.
Conclusion
If you’re searching Adobe Photoshop for beginners, focus on learning the workspace and how to navigate tools and panels efficiently. Grasp the basics of the image, like color correction and exposure.
Embrace the power of layers and non-destructive editing techniques for flexible design workflows. Familiarize yourself with saving options like PSD, JPEG, and PNG to optimize your output.
Keep practicing these fundamental skills, and you’ll steadily master Adobe Photoshop.